Homemade Lemon Curd
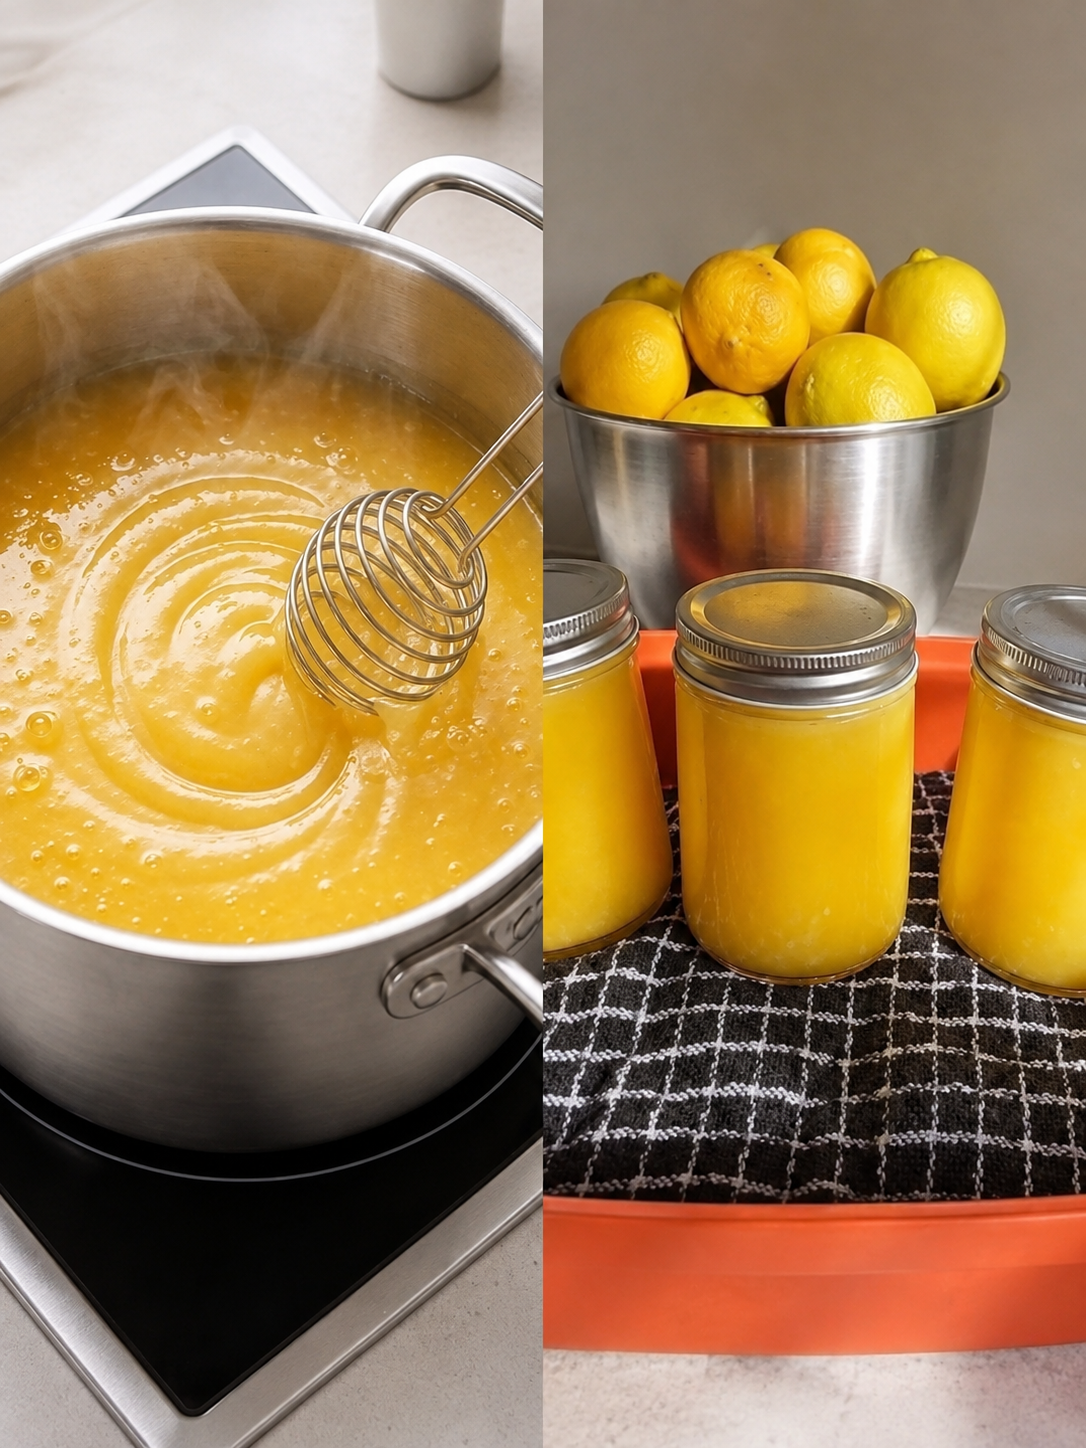
Homemade lemon curd is a bright, smooth, and creamy spread with a fresh lemon flavor and a delicious balance of sweet and tart. It is easy to make at home and can be used in many different ways. You can spread it on toast, spoon it over pancakes, use it between cake layers, fill pastries with it, or serve it with fresh berries and whipped cream.
This homemade lemon curd is made with a few simple ingredients: fresh lemons, eggs, sugar, butter, salt, and optional vanilla extract. The recipe does not require any complicated equipment or special cooking skills. The main thing to remember is to cook the mixture gently and keep stirring while it thickens.
The result is a glossy, silky curd with a rich buttery texture and plenty of fresh lemon flavor.
Why Make Lemon Curd at Home?
Homemade lemon curd has a fresh flavor that makes it very different from many ready-made versions. Fresh lemon juice gives the curd a clean citrus taste, while lemon zest adds extra lemon aroma.
Butter gives the curd a smooth and rich texture, and the eggs help it thicken into a soft, custard-like spread.
There are many reasons to make this recipe at home:
- It uses simple, everyday ingredients.
- Fresh lemon juice gives it a bright flavor.
- Lemon zest adds extra citrus aroma.
- The texture is smooth, creamy, and silky.
- It has a lovely sweet and tart balance.
- It can be made ahead of time.
- It works well for breakfast and desserts.
- It is useful as a cake and pastry filling.
- It can be stored in the refrigerator.
- It can also be frozen for longer storage.
You can also adjust the flavor slightly to suit your taste. If you want a stronger lemon flavor, you can use the lemon zest included in the recipe for a more noticeable citrus aroma. If your lemons are especially tart, the sugar helps balance their acidity.
Ingredients You Need
For this lemon curd, you will need four large fresh lemons, three large eggs, one large egg yolk, granulated sugar, fresh lemon juice, finely grated lemon zest, unsalted butter, a pinch of salt, and optional vanilla extract.
Choose Fresh Lemons
Fresh lemons are important because both the juice and zest are used in this recipe. Choose lemons that feel heavy for their size and have smooth, brightly colored skin.
If possible, use lemons with clean, good-quality skin because you will be grating the outside of the fruit. Organic lemons are a good choice when you plan to use the zest.
Before preparing the lemons, wash them well and dry them completely.
Prepare the Lemon Zest and Juice
Start by washing and drying the lemons.
Use a fine grater or microplane to remove the yellow outer layer of the lemon peel. Try not to grate too deeply. The white layer underneath is called the pith, and it can have a bitter taste.
Measure about 1 tablespoon of finely grated lemon zest.
After zesting the lemons, cut them in half and squeeze out the juice. Pour the juice through a fine-mesh strainer to remove seeds and larger pieces of pulp.
You need approximately ½ cup of fresh lemon juice for this recipe.
Freshly squeezed juice gives the best flavor. Bottled lemon juice can be used, but it usually does not have the same fresh citrus taste.
Combine the Eggs and Sugar
Place the three eggs, one egg yolk, and ¾ cup granulated sugar in a medium heatproof bowl.
Whisk the mixture until the eggs and sugar are well combined and the mixture looks smooth and slightly lighter.
There is no need to beat the eggs vigorously. You only need to mix them evenly.
Add the finely grated lemon zest and a pinch of salt.
The sugar helps balance the sharp flavor of the lemon. It also plays an important role in the final texture of the curd.
Add the Lemon Juice
Slowly pour the fresh lemon juice into the egg and sugar mixture while whisking.
Keep whisking until the juice is fully mixed into the eggs and sugar.
At this point, the mixture will be thin and pale yellow. This is normal. It will become thick during cooking.
Cook the Lemon Curd Slowly
Pour the lemon mixture into a saucepan.
You can also cook it using a double-boiler method. To do this, place the heatproof bowl over a saucepan containing a small amount of gently simmering water.
Cook the mixture over low to medium-low heat.
Stir constantly with a silicone spatula or whisk as the mixture heats.
This is the most important stage of making lemon curd. The eggs need gentle, even heat so they can thicken the mixture without cooking too quickly.
Avoid using high heat. If the mixture becomes too hot too quickly, the eggs can scramble and leave small cooked pieces in the curd.
Continue cooking for approximately 8–12 minutes. The exact time can vary depending on the heat level and the size of your pan.
As the mixture cooks, you will notice it becoming thicker.
Check the Curd
You can check the lemon curd in a few simple ways.
One of the easiest methods is the spoon test.
Dip a spoon into the warm curd and lift it out. The curd should coat the back of the spoon.
Run your finger through the curd on the back of the spoon. If the line stays visible instead of filling in immediately, the curd is ready.
You can also use a kitchen thermometer. The curd will generally thicken at around 170–175°F (77–80°C).
Do not worry if the curd still looks somewhat soft when it is hot. Lemon curd becomes thicker as it cools and chills.
Add the Butter
Once the lemon curd has thickened, remove the pan from the heat.
Add the ½ cup unsalted butter, cut into small pieces. Add the pieces one at a time and stir after each addition.
Continue stirring until all of the butter has melted and the mixture is smooth.
The butter gives the lemon curd its rich flavor and silky texture. When fully mixed, the curd should look glossy and smooth.
If you are using the optional 1 teaspoon vanilla extract, add it at this stage and stir well.
Strain for a Smooth Texture
For an especially smooth lemon curd, pour the warm mixture through a fine-mesh sieve into a clean bowl.
Use a spatula to gently press the curd through the sieve.
This step removes tiny pieces of cooked egg or zest and gives the finished curd a very smooth texture.
Straining is especially useful if you plan to use the lemon curd as a filling for a cake, tart, cupcake, or pastry.
Even when the curd looks smooth in the pan, straining can make the final texture noticeably silkier.
Cool the Lemon Curd
Place a piece of plastic wrap directly on the surface of the warm lemon curd.
This helps prevent a skin from forming on the top as the curd cools.
Let the curd cool at room temperature for about 20–30 minutes.
After that, transfer it to the refrigerator.
The curd will become thicker as it gets cold.
For the best texture when using it as a cake or pastry filling, allow it to chill completely before spreading or piping it.
How to Tell When Lemon Curd Is Ready
There are three simple ways to check the curd.
Spoon Test
The warm curd should cover the back of a spoon. When you draw a finger through it, the trail should remain clear.
Temperature Test
If you have a kitchen thermometer, aim for approximately 170–175°F (77–80°C).
Appearance Test
The finished warm curd should look glossy and thick while still being pourable.
Remember that it will become firmer after it cools and spends time in the refrigerator.
Tips for Smooth Lemon Curd
Cook Over Low Heat
Gentle cooking is the most important part of this recipe.
High heat can cause the eggs to cook too quickly, which may result in scrambled pieces. Keep the heat low and stir continuously.
Use Fresh Lemon Juice
Freshly squeezed lemon juice gives the curd a brighter and fresher flavor.
Bottled lemon juice may work, but it generally does not provide the same fresh citrus character.
Use the Lemon Zest
The yellow part of the lemon peel contains aromatic oils that give the curd a stronger lemon fragrance.
Be careful not to grate too much of the white pith because it can make the curd bitter.
Stir Constantly
Keep stirring while the curd cooks. This helps spread the heat evenly and reduces the chance of the eggs sticking to the bottom of the pan.
Strain the Finished Curd
Straining is an easy extra step that can give you a very smooth final product.
It is particularly helpful when the curd will be used in cakes, tarts, cupcakes, or other desserts where a smooth filling is important.
Let It Chill
Do not keep cooking the curd just because it looks slightly soft while hot.
The curd becomes considerably thicker as it cools, especially after refrigeration.
Ways to Use Lemon Curd
One of the best things about lemon curd is how many ways you can use it.
Spread It on Toast
Spread chilled lemon curd over toast, English muffins, or fresh bread. It makes a simple breakfast taste bright and refreshing.
Serve It with Scones
Lemon curd is delicious with warm scones. Serve it alongside the scones as a sweet and tangy spread.
Use It Between Cake Layers
Chilled lemon curd makes a wonderful filling for cakes. It works especially well with vanilla, lemon, coconut, white chocolate, almond, strawberry, blueberry, and sponge cakes.
Fill Cupcakes
Remove a small amount from the center of baked vanilla cupcakes and fill the space with chilled lemon curd.
Make Lemon Tarts
Use lemon curd as a filling for sweet pastry shells to make an easy lemon tart.
Add It to Pancakes and Waffles
Spoon lemon curd over pancakes or waffles and add fresh berries for a simple dessert-style breakfast.
Stir It into Yogurt
Mix or swirl a little lemon curd into Greek yogurt for a quick breakfast or dessert.
Layer It with Berries
Make a simple dessert by layering lemon curd with fresh berries and whipped cream.
Add It to Pastries
Lemon curd can be used in croissants, Danish pastries, sweet buns, and puff pastry desserts.
Using Lemon Curd as a Cake Filling
Lemon curd is especially useful as a cake filling because its bright flavor pairs well with many different cakes.
Try it with:
- Vanilla cake
- Lemon cake
- Coconut cake
- White chocolate cake
- Almond cake
- Strawberry cake
- Blueberry cake
- Sponge cake
Always chill the lemon curd completely before spreading it onto cake layers.
If you want extra stability, pipe or spread a thin ring of buttercream around the outer edge of the cake layer before adding the lemon curd. This creates a border that helps keep the curd from moving toward the edge.
Easy Lemon Curd Variations
Meyer Lemon Curd
If Meyer lemons are available, you can use them instead of regular lemons. Meyer lemons have a naturally sweeter and more floral flavor, giving the curd a delicate citrus taste.
Lime Curd
Replace the lemon juice and lemon zest with fresh lime juice and lime zest. Lime curd works especially well with coconut desserts.
Orange Curd
Replace some or all of the lemon juice with fresh orange juice. Orange curd has a sweeter citrus flavor and pairs nicely with chocolate desserts.
Lemon-Ginger Curd
Add a small amount of freshly grated ginger while cooking. Ginger gives the bright lemon flavor a gentle spicy warmth.
Lemon-Blueberry Dessert
For an easy no-bake dessert, layer lemon curd with fresh blueberries, whipped cream, and crushed cookies.
Common Problems When Making Lemon Curd
The Eggs Became Lumpy
This usually happens when the mixture is heated too quickly. Use lower heat and stir continuously.
If small lumps appear, pass the finished curd through a fine-mesh sieve before cooling it.
The Curd Looks Too Thin
Warm lemon curd is naturally softer than chilled lemon curd.
Give it enough time to cool and refrigerate before deciding that it is too thin.
If it is still too loose after chilling, it may need additional gentle cooking.
The Curd Is Too Tart
The tartness of lemons can vary. The sugar in this recipe balances the lemon juice, but the final flavor can still depend on the lemons you use.
The Curd Tastes Bitter
Too much white pith can make lemon curd bitter. When grating the lemons, remove only the yellow outer layer.
The Curd Has a Skin
Cover the surface directly with plastic wrap while it cools. This helps stop a skin from forming.
How to Store Lemon Curd
Once the lemon curd has completely cooled, place it in a clean, airtight container.
Keep it refrigerated for up to 1–2 weeks.
Always use a clean spoon when taking curd from the container. This helps maintain its freshness.
Can Lemon Curd Be Frozen?
Yes. Lemon curd can be frozen for longer storage.
Place it in a freezer-safe container and leave a little space at the top because the curd may expand slightly as it freezes.
It can be frozen for approximately 2–3 months.
When you are ready to use it, thaw it overnight in the refrigerator. Stir the curd well before serving or using it in a recipe.
Frequently Asked Questions
Can I Make Lemon Curd Without Butter?
Yes. Butter adds richness and gives the curd its silky texture, but it can be left out. A butter-free lemon curd will be lighter and less rich.
Why Did My Lemon Curd Become Lumpy?
The eggs may have cooked too quickly. Lower the heat and keep stirring while cooking. If there are small lumps, strain the finished curd through a fine-mesh sieve.
Can I Use Bottled Lemon Juice?
Yes, but fresh lemon juice is recommended because it gives the curd a fresher and brighter flavor.
Why Is My Lemon Curd Too Thin?
The curd may simply need more chilling time. Lemon curd becomes noticeably thicker in the refrigerator. If it remains too thin after chilling, it may need a little more gentle cooking.
Can I Make the Curd Sweeter?
Yes. The amount of sugar can be adjusted according to your taste and the acidity of your lemons.
Can I Prepare Lemon Curd in Advance?
Yes. Lemon curd is a useful make-ahead recipe. You can prepare it a day or two before you need it and keep it refrigerated.
Final Thoughts
Homemade lemon curd is an easy recipe that gives you a wonderfully smooth and flavorful result. It combines the fresh taste of lemon with the richness of butter and the creamy texture provided by eggs.
The curd can be used in many ways, from a simple spread for toast to a filling for cakes, cupcakes, tarts, pastries, and other desserts.
The most important thing is to cook it gently. Keep the heat low, stir often, and avoid rushing the cooking process. Fresh lemons will give you the best flavor, while straining the finished curd will help create a smooth and silky texture.
Once the curd has cooled and chilled, it will be thicker and ready to use. Whether you spoon it over pancakes, layer it with berries, spread it between cake layers, or enjoy it with scones, this homemade lemon curd is a simple way to add fresh citrus flavor to your favorite desserts.
Short Recipe
Description
This homemade lemon curd is smooth, creamy, glossy, and full of fresh lemon flavor. It has a delicious balance of sweet and tart flavors and can be used as a spread, cake filling, tart filling, pastry filling, or topping for pancakes, waffles, yogurt, and fresh berries.
Duration
- Prep Time: About 15 minutes
- Cook Time: 8–12 minutes
- Cooling Time: 20–30 minutes, plus chilling
- Total Time: About 45 minutes, plus refrigeration
- Yield: Varies depending on serving size
Ingredients
For the Lemon Curd
- 4 large fresh lemons
- 3 large eggs
- 1 large egg yolk
- ¾ cup granulated sugar
- ½ cup fresh lemon juice
- 1 tablespoon finely grated lemon zest
- ½ cup unsalted butter, cut into small pieces
- Pinch of salt
- 1 teaspoon vanilla extract, optional
Instructions
1. Prepare the Lemons
Wash and dry the lemons. Finely grate the yellow outer part of the peel, avoiding the white pith underneath. Measure 1 tablespoon of lemon zest.
Cut the lemons in half and squeeze out the juice. Strain the juice through a fine-mesh strainer to remove seeds and large pieces of pulp. You will need approximately ½ cup of fresh lemon juice.
2. Mix the Eggs and Sugar
Add the eggs, egg yolk, and granulated sugar to a medium heatproof bowl.
Whisk until the mixture is smooth and slightly lighter in color. Add the lemon zest and salt.
3. Add the Lemon Juice
Slowly whisk the fresh lemon juice into the egg mixture until everything is well combined.
4. Cook the Curd
Pour the mixture into a saucepan, or place the heatproof bowl over a saucepan with a small amount of gently simmering water to make a double boiler.
Cook over low to medium-low heat. Stir constantly with a silicone spatula or whisk.
Cook for approximately 8–12 minutes, or until the mixture thickens.
5. Check the Consistency
The curd is ready when it coats the back of a spoon. Run your finger through the curd on the spoon. If the line stays clear, it is ready.
If using a thermometer, the temperature should generally reach 170–175°F (77–80°C).
6. Add the Butter
Remove the curd from the heat.
Add the butter pieces one at a time, stirring after each addition until the butter melts completely and the curd becomes smooth and glossy.
If using vanilla extract, stir it in now.
7. Strain the Curd
Pour the warm lemon curd through a fine-mesh sieve into a clean bowl.
Gently press it through the sieve with a spatula to remove any tiny cooked egg pieces and create a smooth texture.
8. Cool and Chill
Cover the surface of the lemon curd directly with plastic wrap.
Let it cool at room temperature for about 20–30 minutes, then transfer it to the refrigerator.
The curd will become thicker as it chills.
Tips and Tricks
- Cook the curd over low heat to prevent the eggs from scrambling.
- Stir constantly while the curd is cooking.
- Use fresh lemon juice for the best flavor.
- Grate only the yellow part of the lemon peel because the white pith can taste bitter.
- Strain the curd for the smoothest texture.
- Do not worry if the curd looks slightly soft while hot; it will thicken as it cools.
- Chill the curd completely before using it as a cake or pastry filling.
- Cover the surface directly with plastic wrap to prevent a skin from forming.
- Store the cooled curd in an airtight container in the refrigerator for up to 1–2 weeks.
- For longer storage, freeze the curd for approximately 2–3 months in a freezer-safe container.